Thinking about making a hibiscus drawing? It's a truly pleasant way to spend some time, and you might be surprised how quickly you can bring one of these lovely blossoms to life on paper. Many people find the bright, cheerful look of these flowers quite appealing, and capturing that beauty with just a pencil and some paper can be a very rewarding experience, too.
You don't need to be an experienced artist to get started with this. We're going to walk through a very straightforward way to approach making a hibiscus drawing, helping you put down those first lines with confidence. It's about enjoying the process and seeing your own creation take shape, which is a really good feeling, you know.
This approach is quite flexible, so once you get the hang of it with a hibiscus, you can pretty much use similar ideas for all sorts of other things you might want to sketch out. We'll talk about getting those basic shapes right and then adding a bit more detail, kind of building it up layer by layer.
Table of Contents
- What Makes a Hibiscus Drawing So Special?
- Getting Ready for Your Hibiscus Drawing Adventure
- How Do You Start a Hibiscus Drawing?
- Adding Details to Your Hibiscus Drawing
- What About Bringing Color to Your Hibiscus Drawing?
- Tips for Making Your Hibiscus Drawing Pop
- Can Anyone Really Make a Good Hibiscus Drawing?
- Exploring More Hibiscus Drawing Ideas
What Makes a Hibiscus Drawing So Special?
So, what's all the fuss about a hibiscus drawing? Well, these flowers have a very distinct look, with their wide, open petals and that long, graceful stamen reaching out from the center. It's a shape that, in a way, just feels happy and inviting. When you try to put that on paper, you're not just copying a flower; you're sort of capturing a bit of its sunny spirit. People often feel a sense of calm and focus when they sit down to sketch something from nature, and a hibiscus is a pretty good subject for that, actually. It's got enough interesting bits to keep your hand busy, but not so many that it feels overwhelming, which is nice. You get to really look at the different parts, the way the petals curve, the little bumps on the stamen, and translate those observations into lines. It's almost like a little meditation, really, just putting your attention on one simple, beautiful thing.
The appeal also comes from how forgiving the hibiscus shape can be. You don't have to get every single curve perfectly precise for it to still look like a hibiscus. There's a lot of room for your own personal touch, which makes each hibiscus drawing unique. That’s a pretty cool thing, you know, when you think about it. You can make it a little more flowy, a little more bold, or even just a bit whimsical, and it still holds its charm. It’s a flower that seems to invite creativity, allowing you to play with shapes and shadows without feeling too much pressure. This makes it a great choice for anyone wanting to try their hand at sketching something natural and pretty, without needing to be an art expert right from the start.
Getting Ready for Your Hibiscus Drawing Adventure
Before you even put pencil to paper for your hibiscus drawing, it's good to get a few things together. You don't need a whole studio full of supplies, not at all. Basically, you just need some paper. Any kind of paper will do to start, whether it's a sketchbook page, a piece of printer paper, or even a scrap you have lying around. The main thing is that it's a surface you feel comfortable making marks on. Then, you'll want a pencil. A regular old graphite pencil, like the kind you used in school, is perfectly fine. You might find it helpful to have one that isn't too dark, perhaps an HB or a 2B, just to start with lighter lines. And really, that's pretty much it for the must-haves.
Now, if you want to make things a little easier, you could also grab an eraser. A kneaded eraser is really good because it lifts pencil marks without smudging or damaging the paper, which is a nice touch for a hibiscus drawing that you might want to keep neat. You might also like to have a pencil sharpener handy, so your lines can stay crisp when you need them to. Some folks also enjoy having a reference picture of a hibiscus flower nearby, just to get a good idea of its shape and how the parts fit together. You can find plenty of those online, or if you're lucky, maybe even a real one in a garden. Having a clear image to look at can really help guide your hand, giving you a good starting point for your own creative work.
And then there's the last, but probably most important, thing: a little bit of patience. Not a lot, just a little bit. It's about enjoying the time you spend sketching, rather than rushing to get to a perfect end result. If a line doesn't quite go where you wanted it to, that's totally okay. You can always adjust it, or just let it be part of the unique character of your hibiscus drawing. The whole point is to have a pleasant experience and to feel good about what you're creating. So, just relax, get your simple tools ready, and prepare to have a good time making some art. It's honestly a pretty straightforward setup for something so rewarding.
How Do You Start a Hibiscus Drawing?
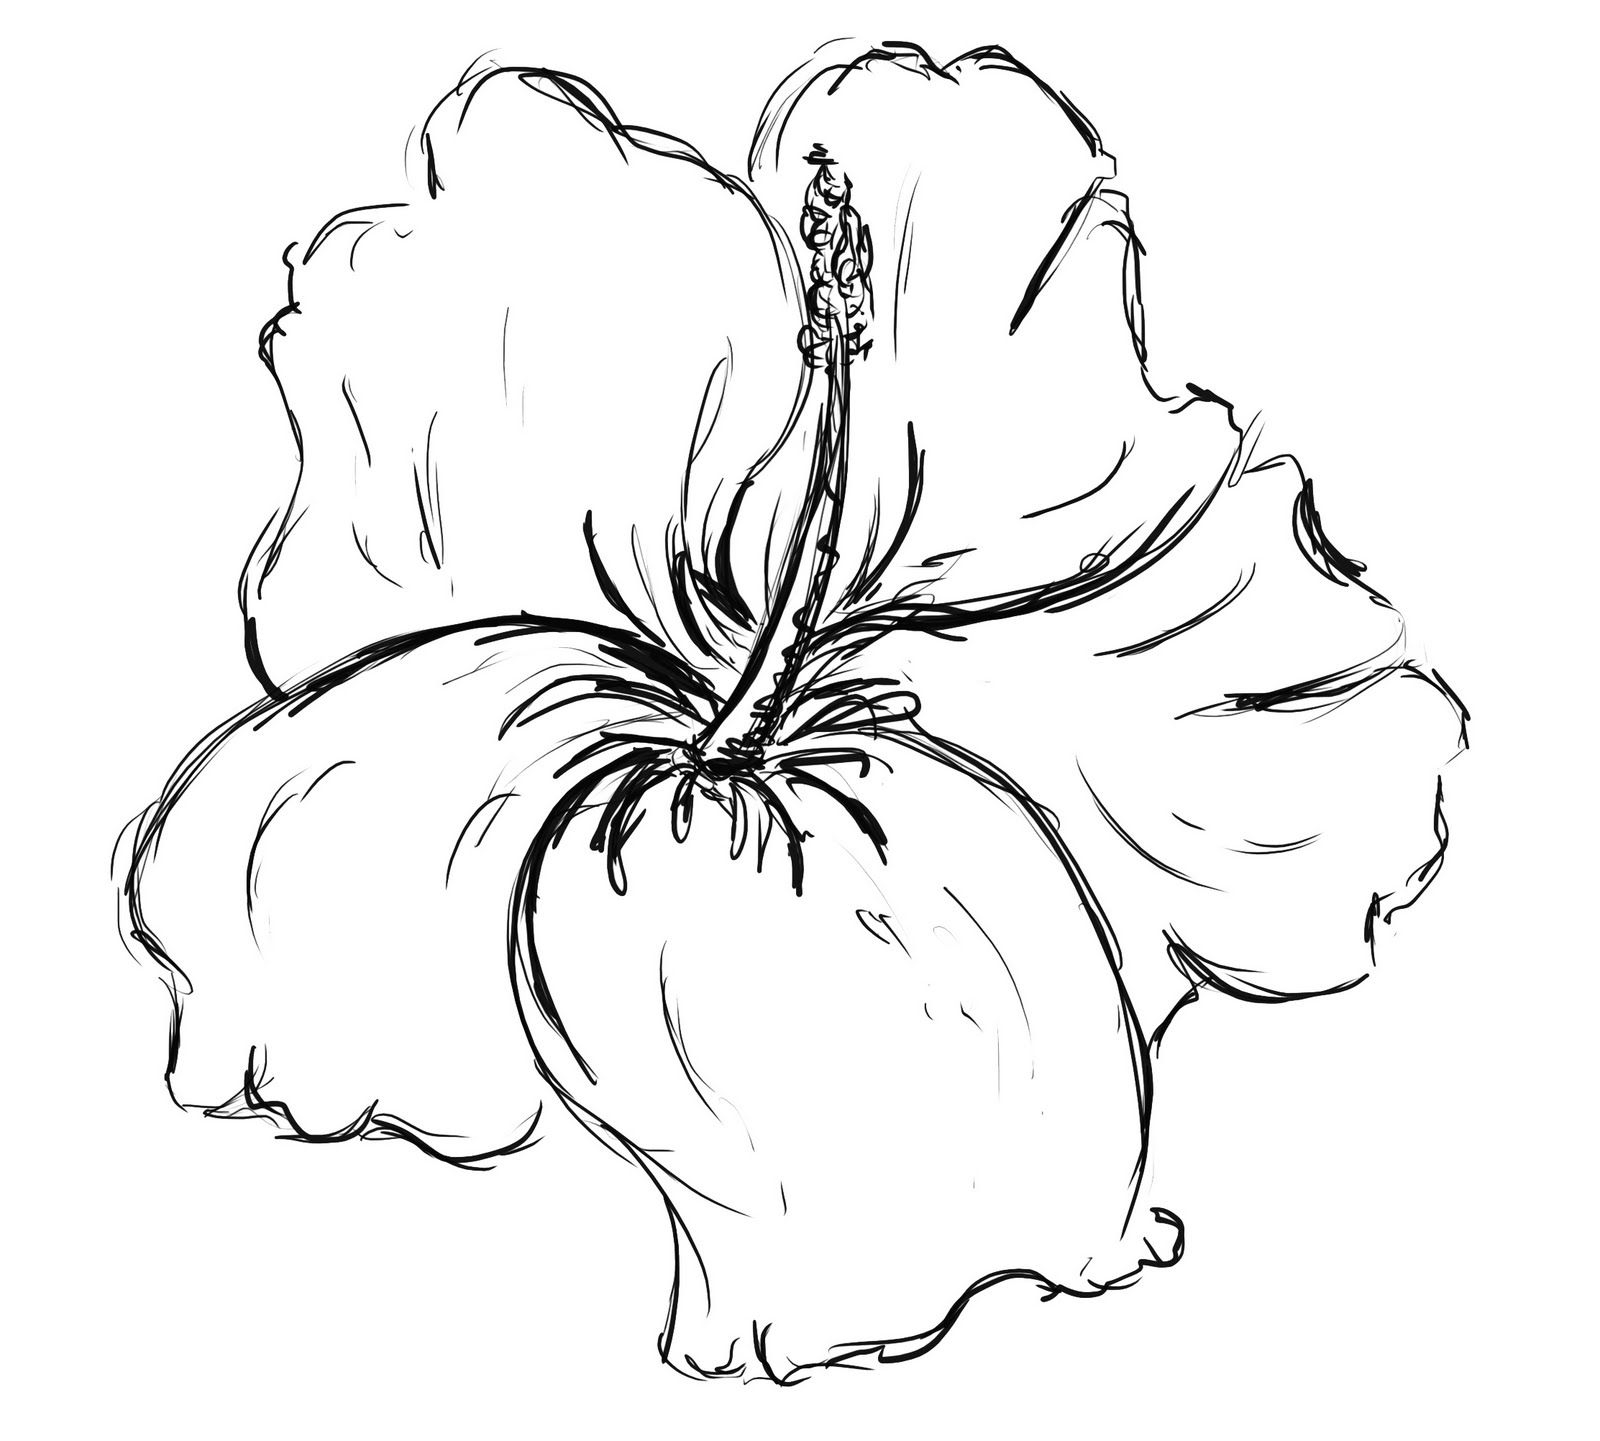
So, you've got your paper and pencil ready. How do you actually begin to make a hibiscus drawing? The best way to start is to think about the very basic shapes that make up the flower. Don't worry about the tiny details yet. Imagine the whole flower as a big, somewhat rounded shape, almost like a cup or a wide bell. You can lightly sketch out this general outline first, just a very soft circle or oval that shows where the main part of the flower will sit on your paper. This is just a guide, so don't press too hard with your pencil; these lines are meant to be almost invisible later on, you know.
Once you have that general shape, start to think about the petals. A hibiscus typically has five petals, and they tend to overlap a bit. You can sketch them out as simple, curved shapes that extend from the central part of your initial circle. Think of them like soft, rounded triangles or heart shapes that haven't quite closed at the bottom. Try to make them different sizes and slightly different angles, as flowers in nature are rarely perfectly symmetrical. This gives your hibiscus drawing a more natural feel. You're just putting down the general placement and size of each petal, sort of mapping out the main components before you add any of the smaller bits. It's a bit like laying out the foundation for a small building, really.
After you've got those main petal shapes in place, it's time to consider the center of the flower. This is where the long stamen comes out. You can draw a small circle or a slightly elongated oval right in the middle of your flower's body. From this central point, a long, thin line will extend outwards, often curving gently. This is the main part of the stamen. At the end of this line, there are usually several little bumps or lobes. You can represent these with small, simple circles or ovals. These initial steps are all about getting the main structure down. It's like building a very simple stick figure before you add clothes and hair, giving your hibiscus drawing a solid skeleton to work from. Just keep your lines light and loose, and don't be afraid to make adjustments as you go. That's actually part of the fun, seeing it come together.
Adding Details to Your Hibiscus Drawing
Once you have the basic shapes of your hibiscus drawing laid out, you can start to give it more life by adding some finer touches. This is where you begin to refine the edges of the petals. Instead of just straight or simple curved lines, think about how real petals have little ripples or gentle dips and rises along their edges. You can go over your initial light lines with a slightly firmer hand, making these more definite, flowing curves. Sometimes, the petals might have a tiny tear or a slight bend, and adding these small imperfections can make your flower look more authentic, more like something found in a garden, which is pretty cool.
Next, pay attention to the stamen. That long central part often has a bit of texture to it. You can add very light, fine lines running down its length to suggest this. And those little bumps at the end, the anthers, you can give them a bit more shape, making them look like tiny, distinct parts rather than just simple circles. You might even add a little bit of shading underneath them to make them seem like they are sitting on top of the stamen, giving your hibiscus drawing a sense of depth. It's all about observing closely and then translating those observations into your pencil marks, you know.
You can also think about the veins in the petals. These are usually very faint, but adding just a few subtle lines radiating out from the center of the flower towards the edges of the petals can really add to the realism of your hibiscus drawing. Don't make them too dark or too many; just a few gentle whispers of lines will do the trick. Remember, you're not trying to draw every single vein, but rather suggest their presence. This stage is all about building up the texture and form, making your flower feel less flat and more like it could almost be picked from a bush. It's a gradual process, basically, adding little bits here and there until it starts to feel right.
What About Bringing Color to Your Hibiscus Drawing?
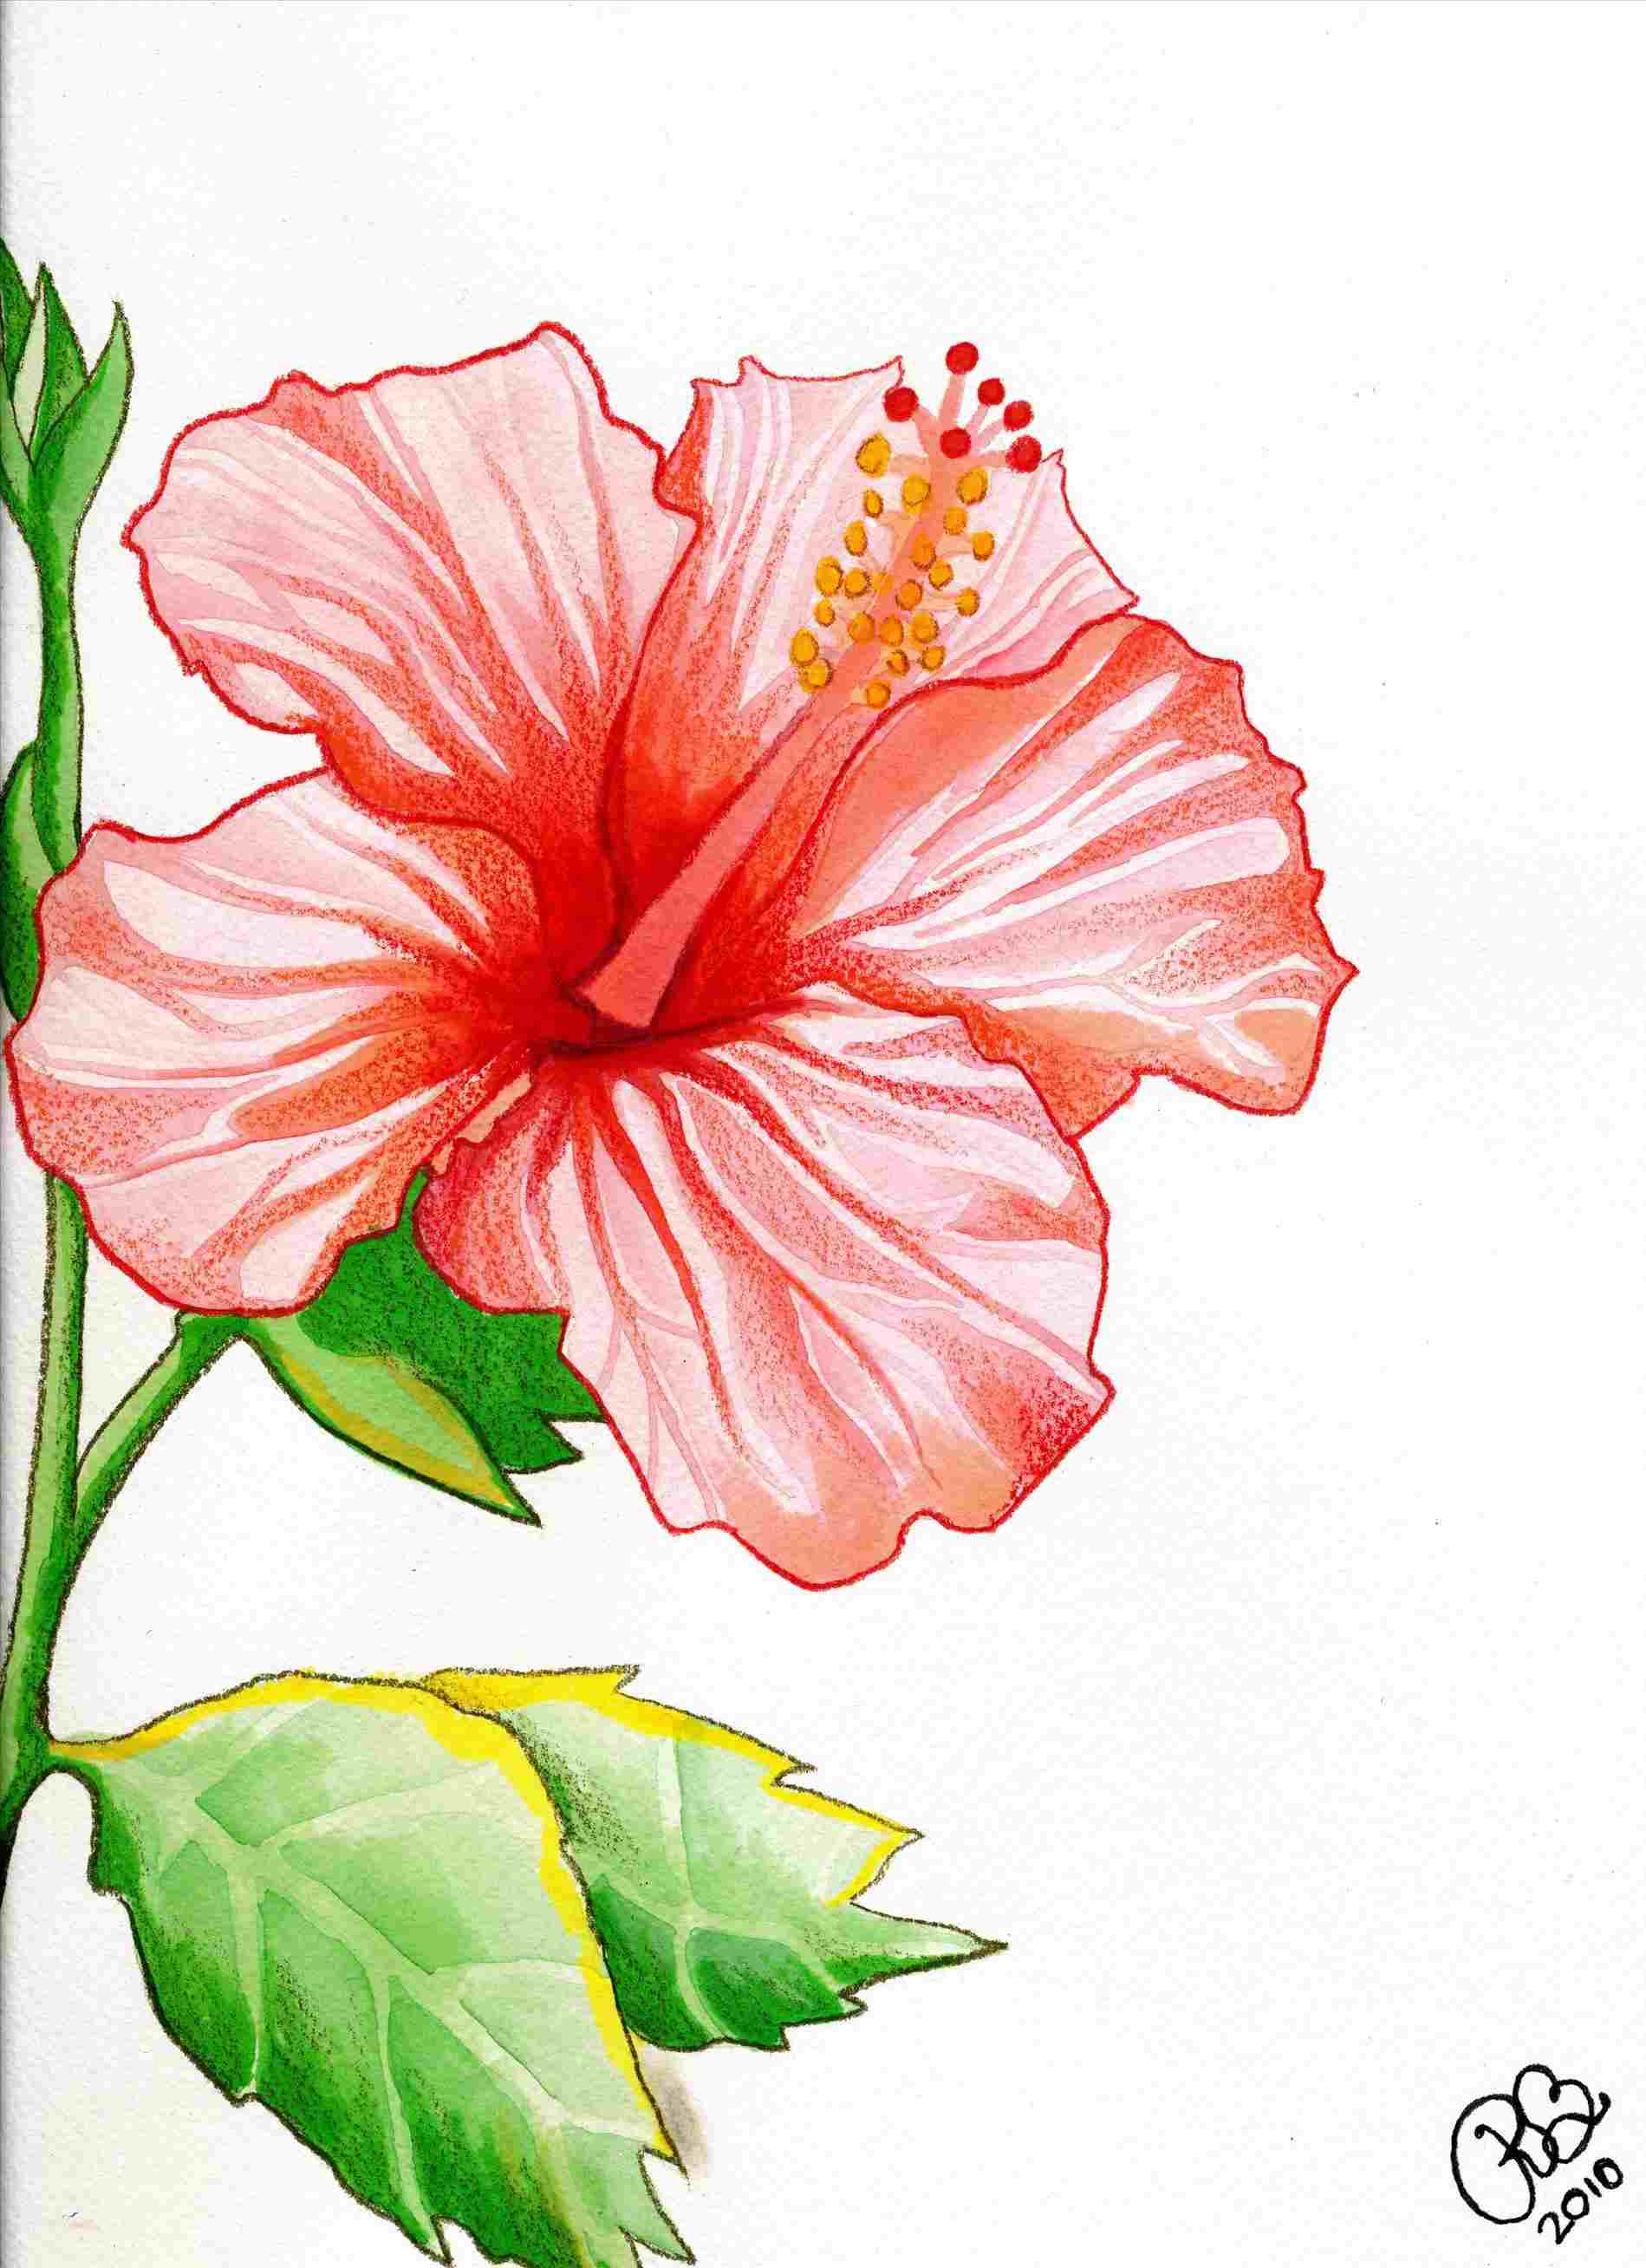
After you've got your hibiscus drawing all sketched out, you might start thinking about adding some color. This is where the flower really comes alive, as hibiscuses are known for their bright, bold hues. You don't need a fancy set of artist's paints to do this, not at all. Simple colored pencils, crayons, or even markers you might have around the house work perfectly well. The key is to think about the main color of your hibiscus first. Is it a vibrant red, a sunny yellow, a soft pink, or a pure white? Pick the main color you want to use for the petals.
When you start coloring, try to apply the color in light layers. Don't press down too hard right away. You can always add more color to make it darker or more intense, but it's much harder to take it away once it's on the paper. So, just gently apply your chosen color to the petals, following the general shape you've already drawn. You can leave some areas a little lighter to suggest where light might be hitting the petals, which gives your hibiscus drawing a bit more dimension. This layering approach is pretty helpful, as it lets you build up the color gradually and make adjustments as you go, you know.
Don't forget the center of the flower and the stamen! These parts often have a different color than the petals, sometimes a contrasting yellow or a deeper red. Color these parts carefully, again using light layers. You might also want to add a bit of green for the stem and any leaves that might be peeking into your hibiscus drawing. Even if you're just using one color for the leaves, varying the pressure of your crayon or pencil can create lighter and darker areas, making them look more interesting. The whole point of adding color is to make your flower pop and feel even more cheerful, so just have fun with it and experiment with what you have. It's a pretty satisfying step, seeing all that vibrancy come through.
Tips for Making Your Hibiscus Drawing Pop
To make your hibiscus drawing really stand out, there are a few little things you can keep in mind. One idea is to think about where the light is coming from. If the light is hitting one side of the flower, that side will be brighter, and the other side will have more shadow. You can add very light shading to the parts of the petals that are turned away from the light, or where one petal overlaps another. This doesn't mean making them completely dark; just a slightly softer touch with your pencil or a slightly darker shade of your color can create a wonderful sense of depth. It's like giving your flower a bit of a three-dimensional feel, which is pretty neat.
Another tip is to pay attention to contrast. If your flower is a light color, maybe make the background just a little bit darker, or vice versa. This helps the flower really jump off the page. You don't have to draw a full background scene; even just a very subtle wash of color or some light scribbles behind the flower can make a big difference to your hibiscus drawing. It helps to separate the flower from the paper and gives it a bit more presence. You're basically guiding the viewer's eye right to the main subject, which is your lovely flower, you know.
Also, don't be afraid to step back from your hibiscus drawing every now and then. Take a little break, then come back and look at it with fresh eyes. Sometimes, you'll spot things you want to adjust or areas where you could add a bit more detail or shading. It's a bit like taking a breath before continuing. And remember, there's no single "right" way to make a hibiscus drawing. Every artist has their own style, and your drawing will reflect your unique way of seeing things. So, just keep experimenting, keep playing with your tools, and most importantly, keep enjoying the process of bringing these beautiful blooms to life on paper. It's all about the experience, really.
Can Anyone Really Make a Good Hibiscus Drawing?
So, is it true that anyone can make a good hibiscus drawing? Absolutely, yes! It's not about having some special talent that only a few people are born with. It's much more about taking things one step at a time and being willing to try. Think about it: when you learn to ride a bike, you don't just jump on and go perfectly the first time. You wobble, you might fall, but you keep trying, and eventually, you get the hang of it. Drawing is very much the same. Each line you put down, each shape you try to create, is a bit of practice. And with practice, things start to feel more natural, and your hands get better at doing what your mind wants them to do.
The beauty of starting with something like a hibiscus drawing is that it’s very forgiving. The flower itself has a natural, organic shape, so if your lines aren’t perfectly straight or your curves aren’t perfectly smooth, it still looks like a flower. This takes a lot of the pressure off. You’re not trying to create a photograph; you’re making your own interpretation, which is pretty cool. For kids, it's a fantastic way to build confidence and see what they can create with just a pencil. For beginners of any age, it’s a gentle introduction to the world of making pictures, showing that art doesn’t have to be hard or intimidating. It's really about the process of putting something down on paper and seeing it take shape, which is a very satisfying feeling, you know.
It also helps to remember that "good" is a very personal idea when it comes to art. What one person considers a "good" hibiscus drawing, another might see differently. The most important thing is that you enjoy the act of creating and that you feel a sense of accomplishment when you're done. Your drawing doesn't have to be perfect for it to be good. It just needs to be yours. So, whether you’re a little one just starting out or an adult picking up a pencil after many years, you absolutely can make a lovely hibiscus drawing. It’s all about having a bit of fun with it and letting your creativity flow, basically. Give it a go; you might be surprised at what you can achieve.
Exploring More Hibiscus Drawing Ideas
Once you've made a few hibiscus drawings and feel a bit more comfortable with the basic steps, you might want to try some different ideas to keep things interesting. You don't have to stick to just one view of the flower. For example, you could try drawing a hibiscus from a different angle. Instead of a full-on frontal view, maybe try one that's slightly turned, or one where you're looking down into the center, or even one that's just starting to open up. Each new angle presents a fun challenge and helps you see the flower in a slightly different way, which is a good exercise for your observation skills, you know.
Another idea is to experiment with different tools for your hibiscus drawing. If you've been using a pencil, maybe try using a pen for your next one. Drawing with a pen means you can't erase, so it encourages you to be a bit more confident with your lines. Or, if you've been using colored pencils, perhaps try watercolors or even just crayons to see what different effects you can get. Each material has its own feel and creates a unique look, which can be really enjoyable to explore. You might find a new favorite way to make art just by trying something a little different.
You can also try drawing a hibiscus with some leaves or a part of the stem attached. This adds a bit more context to your drawing and helps to ground the flower. Or, if you're feeling really adventurous, you could try drawing a whole branch with several hibiscus flowers at different stages of bloom. There are so many possibilities, really, for expanding on your hibiscus drawing skills. You could even look for some printables online that offer outlines to trace or coloring pages to fill in, which can be a relaxing way to practice without having to start from scratch. The main thing is to keep having fun with it and to let your curiosity guide you to new creative adventures.
So, we've walked through how simple it can be to make a beautiful hibiscus drawing. We talked about gathering just a few basic tools like a pencil and paper, and how to start with light, general shapes before adding more specific details. We also touched on bringing in color with whatever you have, from crayons to colored pencils, and how layering helps. Plus, we shared some helpful ideas for making your drawings stand out, like thinking about light and shadow, and the importance of just enjoying the process. It's clear that anyone can pick up a pencil and create their own lovely hibiscus flower, whether they're just beginning or looking for new drawing ideas.