Have you ever looked at a dull, ordinary stone and wondered what secrets it might hold inside? What if you could take something so unassuming and transform it into a sparkling gem, a little piece of natural art? Well, you know, that's exactly what people do with a rock tumbler, turning rough, unpolished bits of earth into smooth, shiny treasures. It’s a pretty neat way to connect with the planet's raw beauty, really.
This pursuit, which some folks call rock tumbling, is more than just a simple activity; it's a way to witness a bit of natural magic unfold right in your own home. It’s about patience, about seeing the hidden splendor within something seemingly plain, and then, you know, helping that splendor come out. For many, it's a quiet, satisfying hobby that brings a lot of joy, especially when you finally get to see those finished, gleaming stones.
And what’s quite wonderful about this particular pastime is the sense of shared enthusiasm you find. There's a whole world of people who enjoy this, a kind of group feeling that’s, well, as lasting as the very stones we work to make shiny. It’s a place where everyone, from newcomers to those who have been doing this for a long time, can swap stories and tips, and just generally talk about their passion for all things geological. You can, in a way, learn so much from others who share this interest.
Table of Contents
- Getting Started with a Rock Tumbler
- Finding the Right Stones and Grit for Your Rock Tumbler
- The Step-by-Step Process with Your Rock Tumbler
- Cleaning and Finishing Your Rock Tumbler Treasures
Getting Started with a Rock Tumbler
So, if you're thinking about getting into this neat little hobby, the very first thing you’ll probably want to think about is the spinning machine itself, the rock tumbler. There are quite a few different kinds out there, and some are, well, pretty good for just starting out, while others are more for folks who have been doing this for a while. For instance, I've heard that particular rotating machine for stones, like a Thumler's brand one, ought to perform quite well for most people. It's almost like a reliable workhorse for this sort of thing, you know? Many people who spend time polishing rocks tend to lean towards these kinds of devices for their consistent operation and the quality of the results they help achieve.
It's interesting to consider that even a machine that’s had a bit of a past can still be a great starting point. My own child, who is completely taken with stones, just received a fixed-up spinning polisher from a pal for his special day. It was, apparently, a rotary tumbler that had been given a new life, and it’s been absolutely wonderful for him. This really goes to show that you don't always need something brand new to get going. Sometimes, a little bit of care and attention to an older machine can give you just what you need to begin your rock-polishing adventures. It's actually quite common for people to find older models that still have plenty of life left in them, which is pretty cool.
What Kind of Rock Tumbler is Best for Beginners?
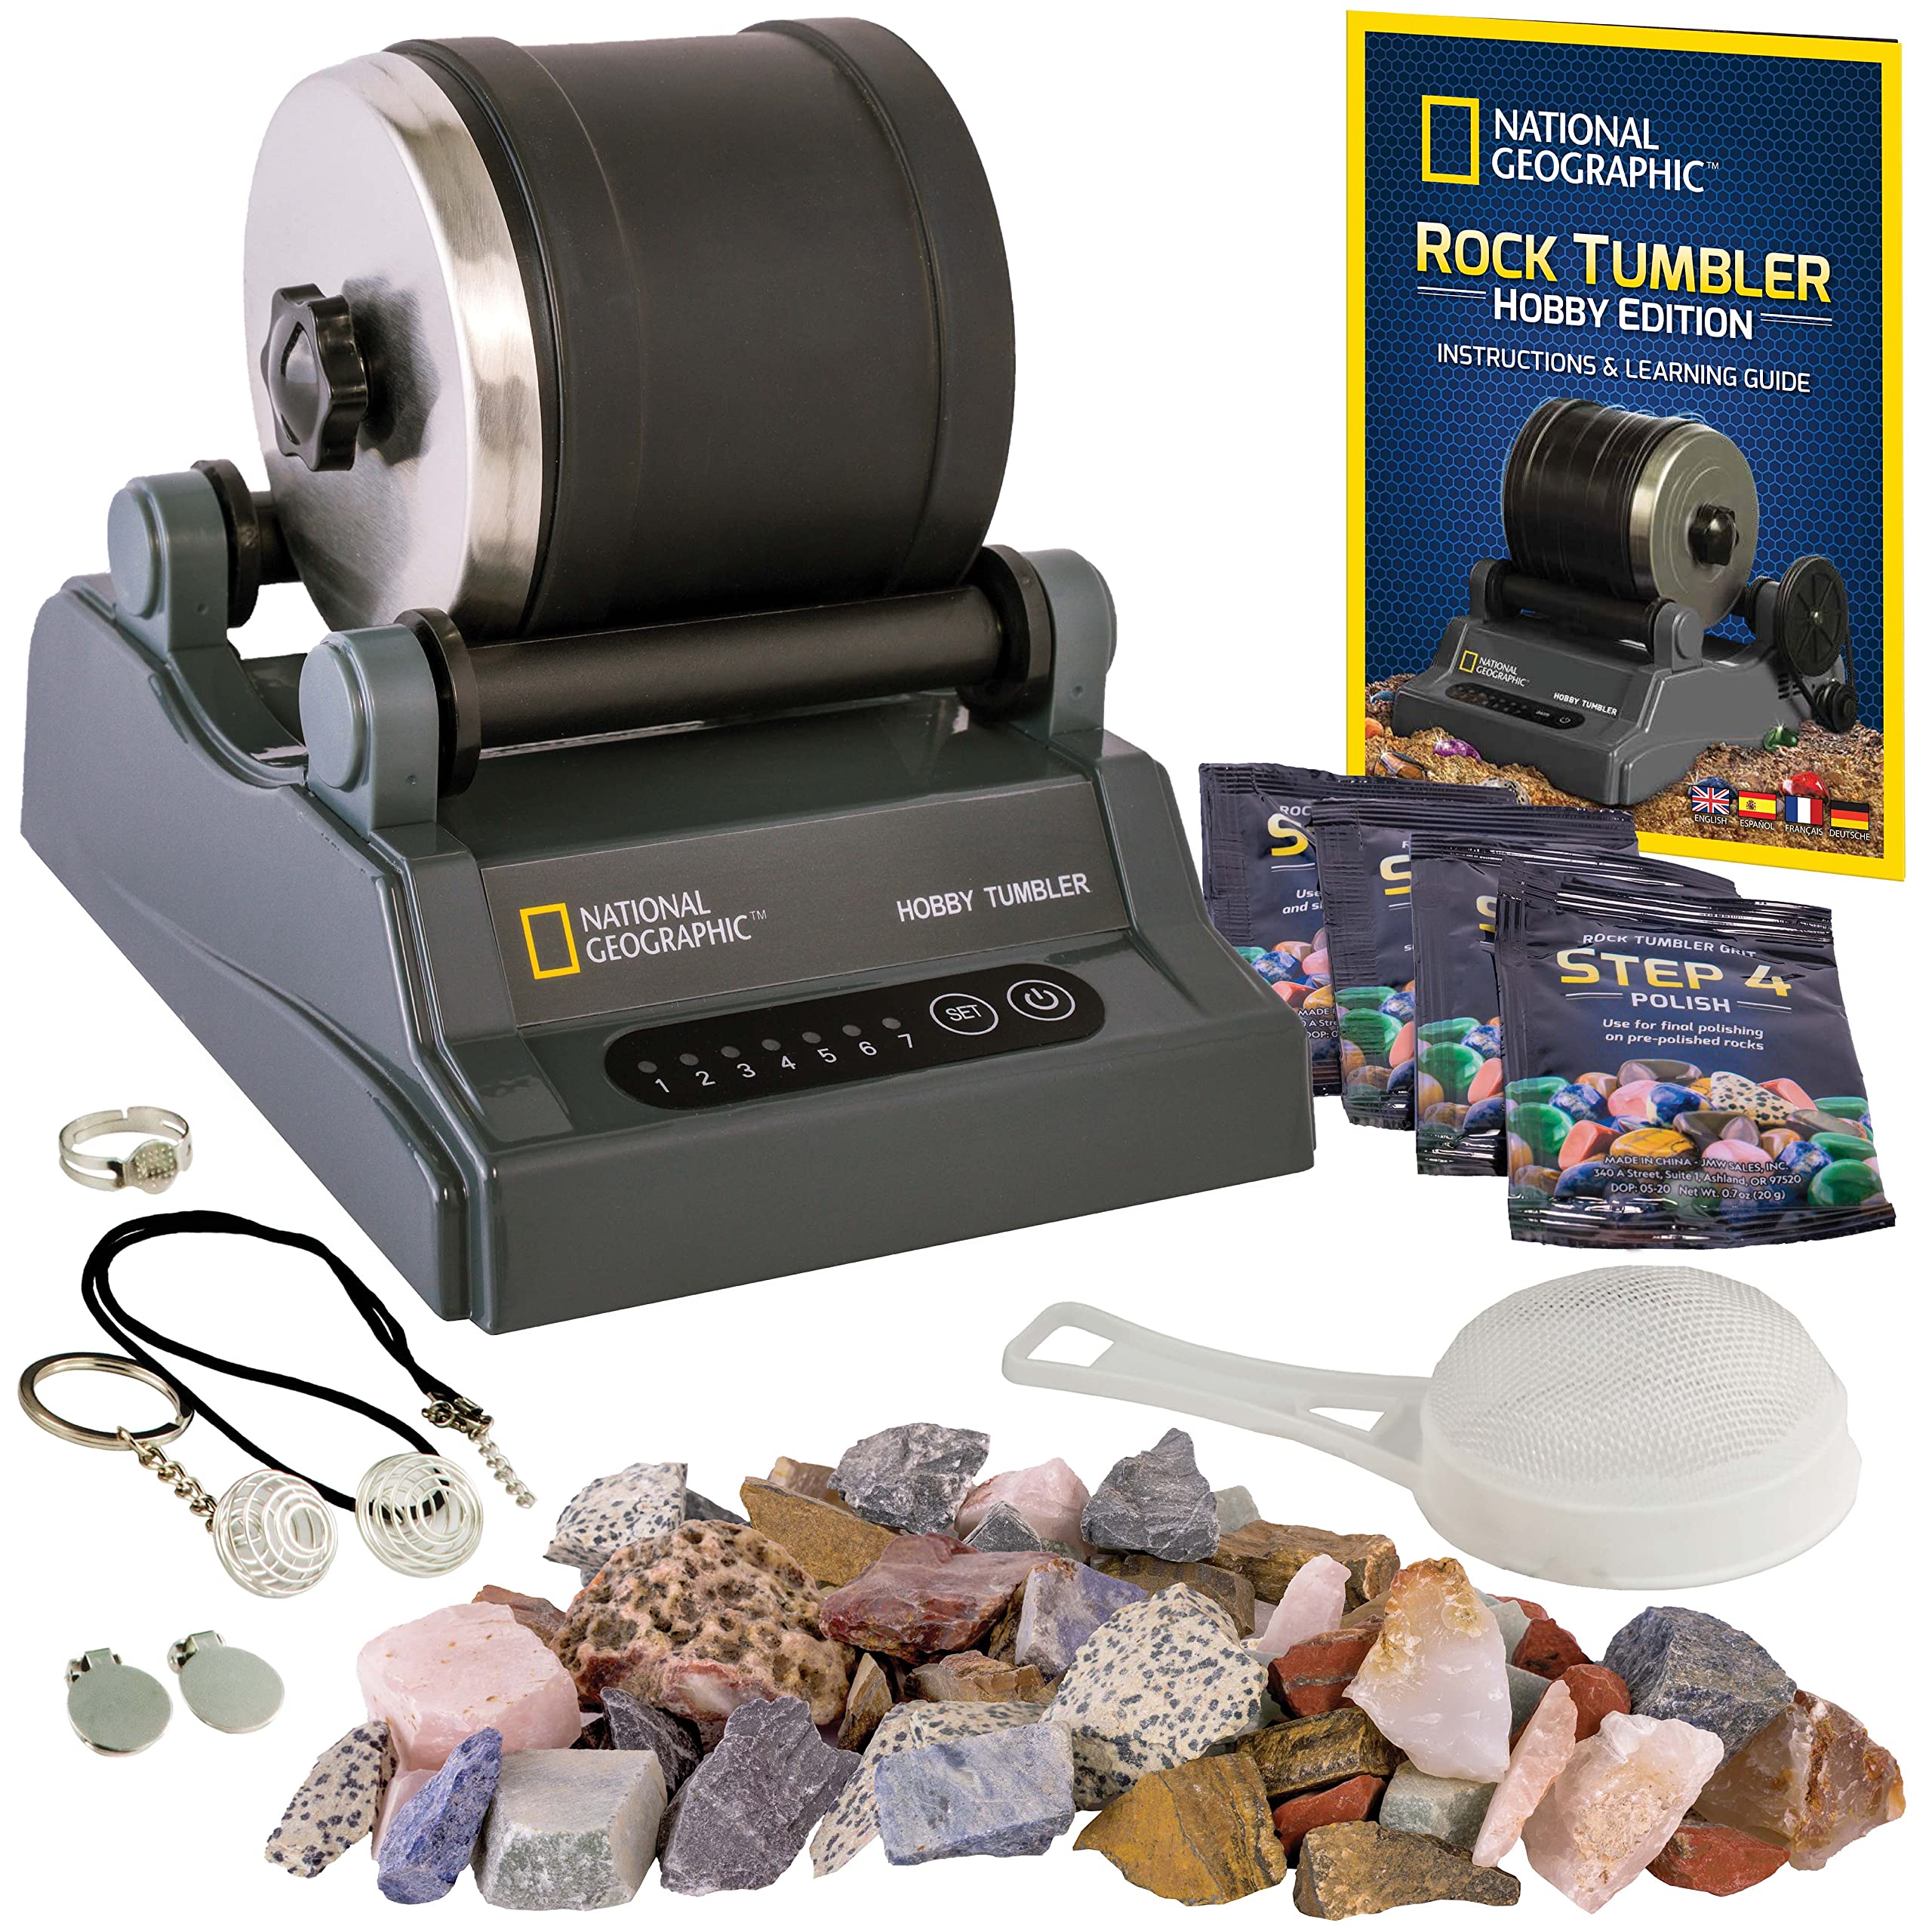
When you're just dipping your toes into the world of making stones shiny, picking the right spinning machine can feel a little bit like a big decision. But honestly, it doesn't have to be. For someone just starting, something like the National Geographic beginning stone polisher set, the one that holds a pound, seems to be a popular choice. We've seen hundreds of people, 645 to be exact, who have shared their thoughts on it, which suggests it’s a pretty widely used option for those new to the rock tumbler process. These starter sets usually come with everything you need to get going, which is super helpful, you know, so you don't have to figure out all the bits and pieces on your own right away.
Then again, for those who might be a little more serious or want to upgrade later, there are other options. I've heard about people using a pair of those Thumler's Model B stone polishers, which are generally considered a step up. And for those who like to prepare their own rough stones, getting something like a Lortone 14-inch cutting device for rocks back in 2021 from someone can be a good move. That’s for cutting larger pieces down, you know, before they even get to the rock tumbler. So, it really depends on how deep you want to get into the hobby right from the start, but there are definitely good options for every level of interest, which is pretty reassuring.
Finding the Right Stones and Grit for Your Rock Tumbler
Once you have your spinning machine all set up, the next big thing is figuring out what to put inside it. This is where the real fun begins, because you get to pick the stones that you want to make beautiful. And it’s not just about the stones; it’s also about the special sandy stuff, what we call grit, that actually does the work of smoothing and shining them. You need different levels of this abrasive material, starting with rougher ones and moving to very fine ones. It’s a bit like sandpaper for rocks, you know? Getting the right combination of stones and abrasive material is absolutely key to getting those lovely, polished results from your rock tumbler.
It’s really quite something to see how a plain, rough piece of rock changes over time with the right grit. You start with something that might just look like a common pebble from the ground, and after several rounds, it becomes something you’d want to display. The different types of abrasive material play a really important part in this transformation. For example, you might begin with a really coarse one, like a 60 grit, to take off all the rough edges and shape the stone. Then you move on to finer ones, and each step helps to get the stone a little bit smoother, a little bit closer to that final, mirror-like finish. It’s a truly fascinating process, actually, watching the stone slowly reveal its inner beauty.
What Materials Work Well in a Rock Tumbler?
So, when you're thinking about what to put inside your rock tumbler, you have quite a few choices, and some might surprise you. For the abrasive material itself, we usually talk about things like 60 grit, then something a little finer like 180/220, then 500, and then a really fine one for the final shine, like 1200 aluminum oxide. These are the standard kinds of abrasive powders that help get the job done. But what about the things you put in with the rocks to help them tumble properly? That's where it gets interesting.
You might be surprised to learn that small stones from a fish tank could possibly be useful as a filler material, or even the sandy stuff for children's areas from the nearby hardware shop. These can sometimes help the rocks move around better inside the machine. And, of course, the main stars are the stones themselves. Unpolished bits of stone, like those from the quartz group, might also be suitable to put in there. My role has involved helping my child as he figures out how to achieve the most desirable outcomes with his stones, and we’ve been exploring all sorts of things that could work. I even came across information in another place that suggested this was something I could achieve with various materials, which is pretty cool.
The Step-by-Step Process with Your Rock Tumbler
Getting your rocks from rough to shiny isn't just a one-and-done kind of deal; it’s a process that happens in stages, and each stage uses a different kind of abrasive material. It’s a bit like a marathon, not a sprint, you know? You start with the coarsest abrasive, and that’s when the real shaping of the stones happens. This first stage is where all the bumps and sharp edges start to get worn down. It’s quite satisfying to see the transformation even at this early point. This is basically the foundation for all the shine that will come later from your rock tumbler.
Then, you move on to progressively finer abrasive materials. Each time you switch to a finer grit, you're essentially smoothing out the tiny scratches left by the previous, coarser one. It’s a very gradual process, but it’s also what makes the final result so impressive. You really have to trust the machine and the process, because for a long time, the rocks don't look like much. But then, little by little, they start to show their true colors and patterns. It's a testament to the power of gentle, consistent movement and the right abrasive materials, which is pretty neat.
How Long Does Each Stage in a Rock Tumbler Take?
When you're working on making stones shiny, the amount of time you spend on each step is really important. From what I’ve learned and seen, each stage of abrasive material was used for about seven days. So, that means a whole week for the really rough stuff, another week for the next level of smoothness, and so on. It’s not something you can rush, honestly. If you try to speed it up, you might not get the kind of smooth, unblemished surface you're hoping for. It’s a bit like baking, you know, you can't just pull the cake out of the oven early and expect it to be perfectly done.
This weekly schedule for each type of abrasive material allows the spinning machine to do its work properly. The rocks need that consistent movement against the abrasive to slowly wear away the imperfections and get smoother and smoother. It's a commitment, for sure, but the results are definitely worth the wait. My child and I have found that sticking to this kind of schedule really does make a difference in how the stones turn out. It's all about giving the rock tumbler enough time to do its job, essentially, so that each stone can reach its full potential for shine and smoothness.
Cleaning and Finishing Your Rock Tumbler Treasures
After all the grinding and smoothing with different kinds of abrasive materials, you're almost at the finish line. But before you get to that truly brilliant shine, there’s a really important step: cleaning. You see, even after using the finest abrasive, there can still be tiny bits of leftover grit or rock dust clinging to your stones. If you don't get rid of these completely, they can actually scratch your stones during the final polishing stage, which would be a real bummer after all that effort. So, making sure your stones are super clean is a pretty big deal before the final step in your rock tumbler.
It’s kind of like preparing a canvas before you paint a masterpiece; you want it to be perfectly clear and ready. This cleaning step is what sets up your stones for that amazing, reflective surface. It might seem like a small thing, but it truly makes a huge difference in the final look and feel of your polished treasures. You want them to be as pristine as possible before that very last spin, you know, to really let their natural beauty come through without any cloudy bits or lingering dullness from the earlier stages. It’s a vital part of the whole process, actually, ensuring all your hard work pays off.
Why Use OxiClean in a Rock Tumbler?
So, you might be wondering, after all that talk about abrasive materials and stages, why would you put something like OxiClean in with your rocks? Well, following the third round of making them shiny, I kept them spinning for a couple of hours with a small amount of OxiClean. This isn't for polishing, really, but for a very important cleaning purpose. OxiClean, or something similar, helps to get rid of any lingering residue from the abrasive materials and the rock dust that might still be stuck in tiny cracks or on the surface of the stones. It’s basically a super-effective way to give your stones a thorough wash before that final, delicate polish.
It’s kind of like giving your stones a really good bath, you know, to make sure they are squeaky clean before they get their final gleaming coat. If those tiny bits of grit are left on, they can interfere with the final polishing stage, leaving little dull spots or even new, tiny scratches. Using a cleaning agent like OxiClean helps ensure that the surfaces are absolutely pristine, allowing the final fine abrasive material to work its magic without any interference. It's a small step, but it definitely contributes to getting that truly spectacular, mirror-like finish on your rock tumbler creations, which is pretty satisfying.