Learning how to sketch a nose might feel a little bit like trying to solve a puzzle, especially when you are just starting out. It is a part of the face that, for many, seems to present a particular kind of challenge. But, you know, with a little guidance and some friendly pointers, it turns out to be a really achievable goal, even for those picking up a pencil for the first time. This piece is going to walk you through some simple ideas and helpful tips that can make the whole process of creating a nose on paper a good deal less intimidating and, actually, quite enjoyable.
Often, folks wonder where to even begin with this facial feature, as it sticks out from the face in a very unique way, making it seem a bit tricky to capture its shape accurately. Yet, there are some pretty straightforward approaches that can simplify what appears to be a complex form into something much more manageable. We will look at how taking a large form and breaking it down into smaller, simpler shapes can really help you get a handle on things, giving you a solid foundation for your art piece. It is, basically, about seeing the big picture and then finding the smaller bits that make it up, you know?
So, whether you are aiming for a very real-looking nose or something with a bit more of a personal, artistic flair, the ideas we are going to share here are meant to help you build your confidence and improve your skills. It is all about giving you the tools to create noses that look just right for your drawings, no matter the angle or the kind of expression you are trying to show. You might be surprised, too, at how quickly you can start seeing real progress with just a few simple changes to your approach. It really is something anyone can get better at, given a bit of time and interest.
Table of Contents
- Why Does Drawing a Nose Feel So Tricky?
- Getting Started with Nose Drawing- The Basics
- Simplifying the Structure of Nose Drawing
- Exploring Different Angles for Nose Drawing
- Nose Drawing- Seeing the Front View
- Nose Drawing- Capturing the Side View
- Nose Drawing- Thinking About Angles
- Adding Depth- Light and Shadows in Nose Drawing
Why Does Drawing a Nose Feel So Tricky?
For many folks who are just starting to put pencil to paper, making a nose look believable can feel like a bit of a puzzle. It really is, in some respects, one of those parts of the face that seems to give people a lot of trouble. A big reason for this, you know, is that a nose does not lie flat on the face; it actually sticks out into the world in a very distinct way. This three-dimensional quality means you are not just drawing a flat shape, but something that has volume and form, which can be a little different to wrap your head around at first. It is almost like trying to draw a small hill that is sitting on a flat piece of land, rather than just a shape on a piece of paper.
When you are looking at a nose, you are also seeing how light falls on it and how shadows are created because of its unique shape. This play of light and dark is what gives it that feeling of being real, of having depth. Without really thinking about how those bright spots and shaded areas work together, a nose drawing can end up looking a bit flat or, you know, not quite right. It is a bit like trying to describe a round apple without talking about how the light hits its surface, making some parts brighter and others darker. So, getting a handle on how light and shadow behave on this particular feature is, frankly, a pretty important part of making it look genuine.
Plus, every person’s nose is a little bit different, which adds another layer to the challenge. There are so many kinds of nose shapes out there, from those that are quite narrow to those that are broader, some with a gentle curve, others with a more defined bridge. This variety means that what works for one nose might not quite fit another, which can be, you know, a bit overwhelming when you are trying to learn a general method. But, honestly, this variety is also what makes drawing noses so interesting. It gives you, like, endless chances to observe and practice, which is really what helps you get better over time. It is all about looking closely and seeing the unique characteristics of each one.
Getting Started with Nose Drawing- The Basics
If you are new to putting lines on paper, figuring out how to start a nose drawing can feel like a big deal. The good news is, there are some very simple, step-by-step ways to approach it that can make it much less intimidating. It is not about being perfect right away, but about building up your skills one small piece at a time. Think of it like learning to bake a cake; you do not just throw everything in at once, you follow a recipe, adding ingredients in a particular order. This kind of methodical approach is, you know, super helpful when you are trying to capture something as distinct as a nose.
One of the most helpful things you can do, when you are beginning, is to think about the nose not as a single, complicated thing, but as a collection of simpler shapes. This idea, which is something many professional artists use, really helps to break down the task into manageable parts. Instead of trying to draw every tiny detail at the start, you begin with, say, a few circles or squares that represent the main parts of the nose. This basic framework gives you a solid place to build from, making it much easier to add those finer details later on. It is, basically, about creating a kind of skeleton for your nose drawing before you put the skin on, if that makes sense.
As you get going, you will find that just spending a little bit of time each day, putting pencil to paper, will make a real difference. It is not about having some kind of special talent, but about consistent effort. Like, you know, practicing a musical instrument; the more you do it, the more comfortable and skilled you become. This regular practice, even just for a few minutes, helps your hand and your eye work better together, which is really what drawing is all about. So, grab your drawing tools, and let us get ready to make some marks on the page. You will be surprised, too, at how quickly you start to see improvement in your nose drawing skills.
Simplifying the Structure of Nose Drawing
When you are trying to make a nose drawing, one of the best tricks you can use is to think about its structure in very simple terms. Instead of seeing all the curves and subtle bumps, try to imagine it as a collection of basic geometric shapes. This approach, which is actually quite common among people who draw for a living, helps you get the main proportions right before you worry about the finer points. It is like, you know, building a house; you start with the foundation and the main frame before you add the windows and doors. This foundation is really what gives your nose drawing its believable form.
For example, you might think of the main part of the nose as a kind of block or a cylinder, and then the nostrils as smaller, rounded shapes attached to it. Or, perhaps, you see the tip of the nose as a sphere, with the wings of the nose extending out from it. The specific shapes you choose are less important than the act of simplifying. The point is to reduce something that seems complex into parts that are easier to draw. This method, honestly, takes a lot of the pressure off, allowing you to focus on getting the overall placement and size correct first. It is a bit like sketching out a rough map before you fill in all the little streets and landmarks, you know?
Once you have these basic shapes laid down, you can then start to connect them with softer lines, gradually refining them to create the actual contours of the nose. This gradual process helps you build up the form bit by bit, rather than trying to get it all right in one go. It also gives you a chance to adjust things as you go along, which is pretty helpful, especially for beginners. This way of thinking about the nose, as a combination of simple forms, really does make the whole process of nose drawing feel much more manageable and, in a way, quite logical. It is a very effective strategy, actually, for tackling what might seem like a tricky part of the face.
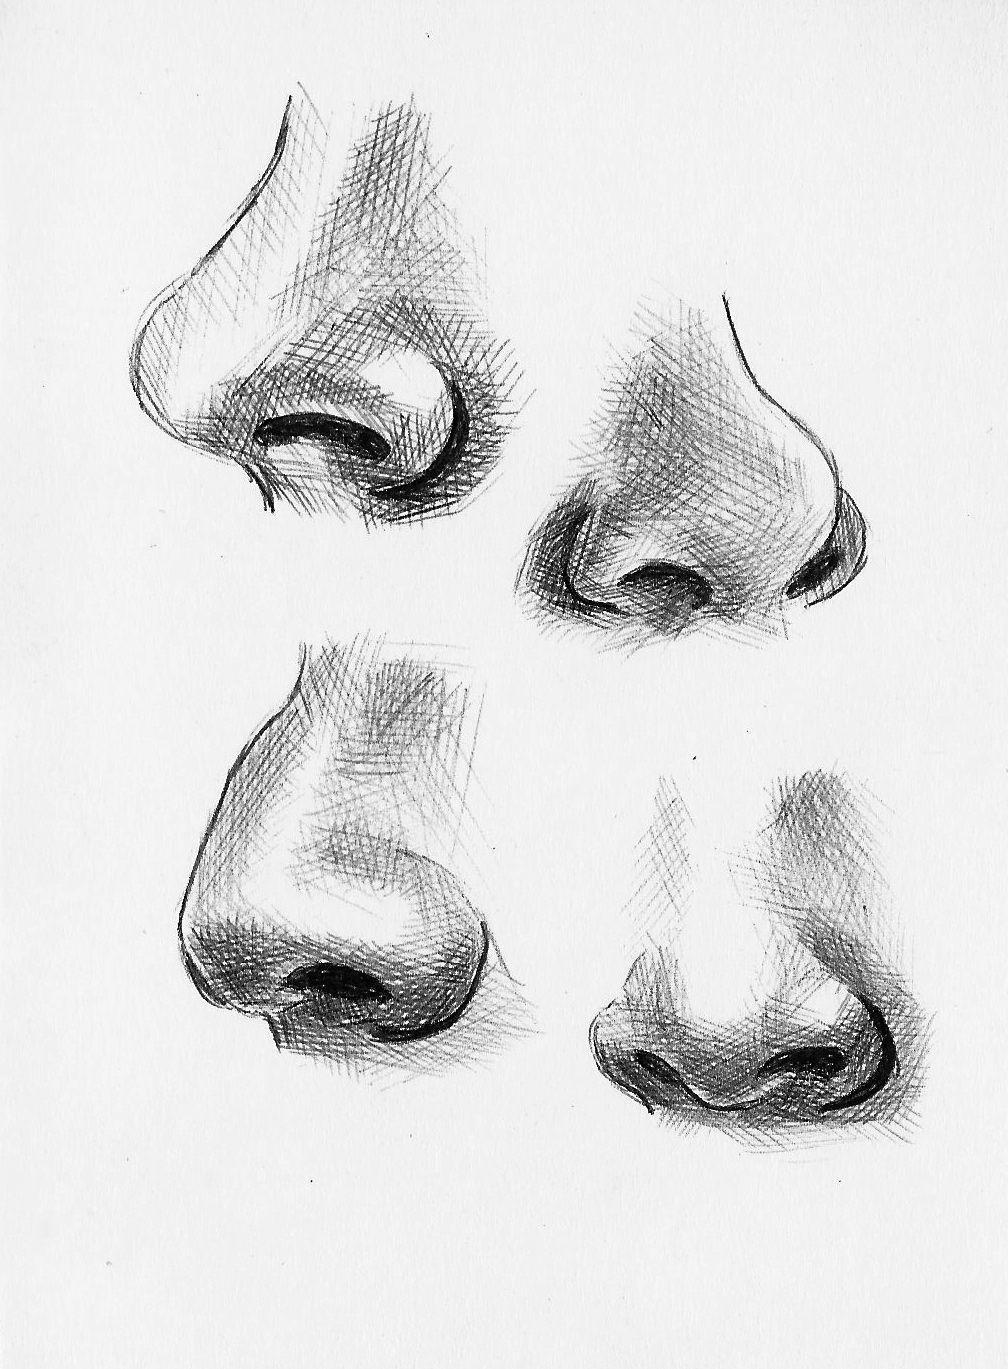
Exploring Different Angles for Nose Drawing
A nose does not always face you straight on, does it? People move their heads, and so, you will often find yourself needing to draw a nose from a variety of perspectives. Getting a good handle on how to make a nose drawing look right from the front, from the side, or even from an in-between angle, is, you know, a pretty important skill for anyone who likes to draw faces. Each view presents its own set of considerations, and understanding these can really help you make your drawings feel more alive and dynamic. It is almost like learning to see the same object from different points in a room, how it changes its appearance depending on where you are standing.
When you are trying to draw a nose from different angles, it is helpful to remember those basic shapes we talked about earlier. Those simple forms, like spheres and blocks, can be turned and tilted in your mind, which then helps you figure out how they would look on paper from a new viewpoint. This kind of spatial thinking is, frankly, a big part of getting angles right in any kind of drawing. It is about imagining the nose as a solid object in space, rather than just a flat image. This way, you can mentally rotate it and then sketch what you see, which is, basically, how many artists approach this kind of challenge.
So, whether you are trying to capture a nose looking straight at you, or one that is turned away slightly, or even a full profile, the core ideas remain similar. It is all about observing, simplifying, and then building up the form. Each new angle is, in a way, just another chance to practice these core ideas and to see how the light and shadow play out in different situations. It really is a fun challenge, too, once you get the hang of it, and it adds a lot of life to your nose drawing pieces. You will find, too, that the more you try different angles, the more intuitive the whole process becomes.
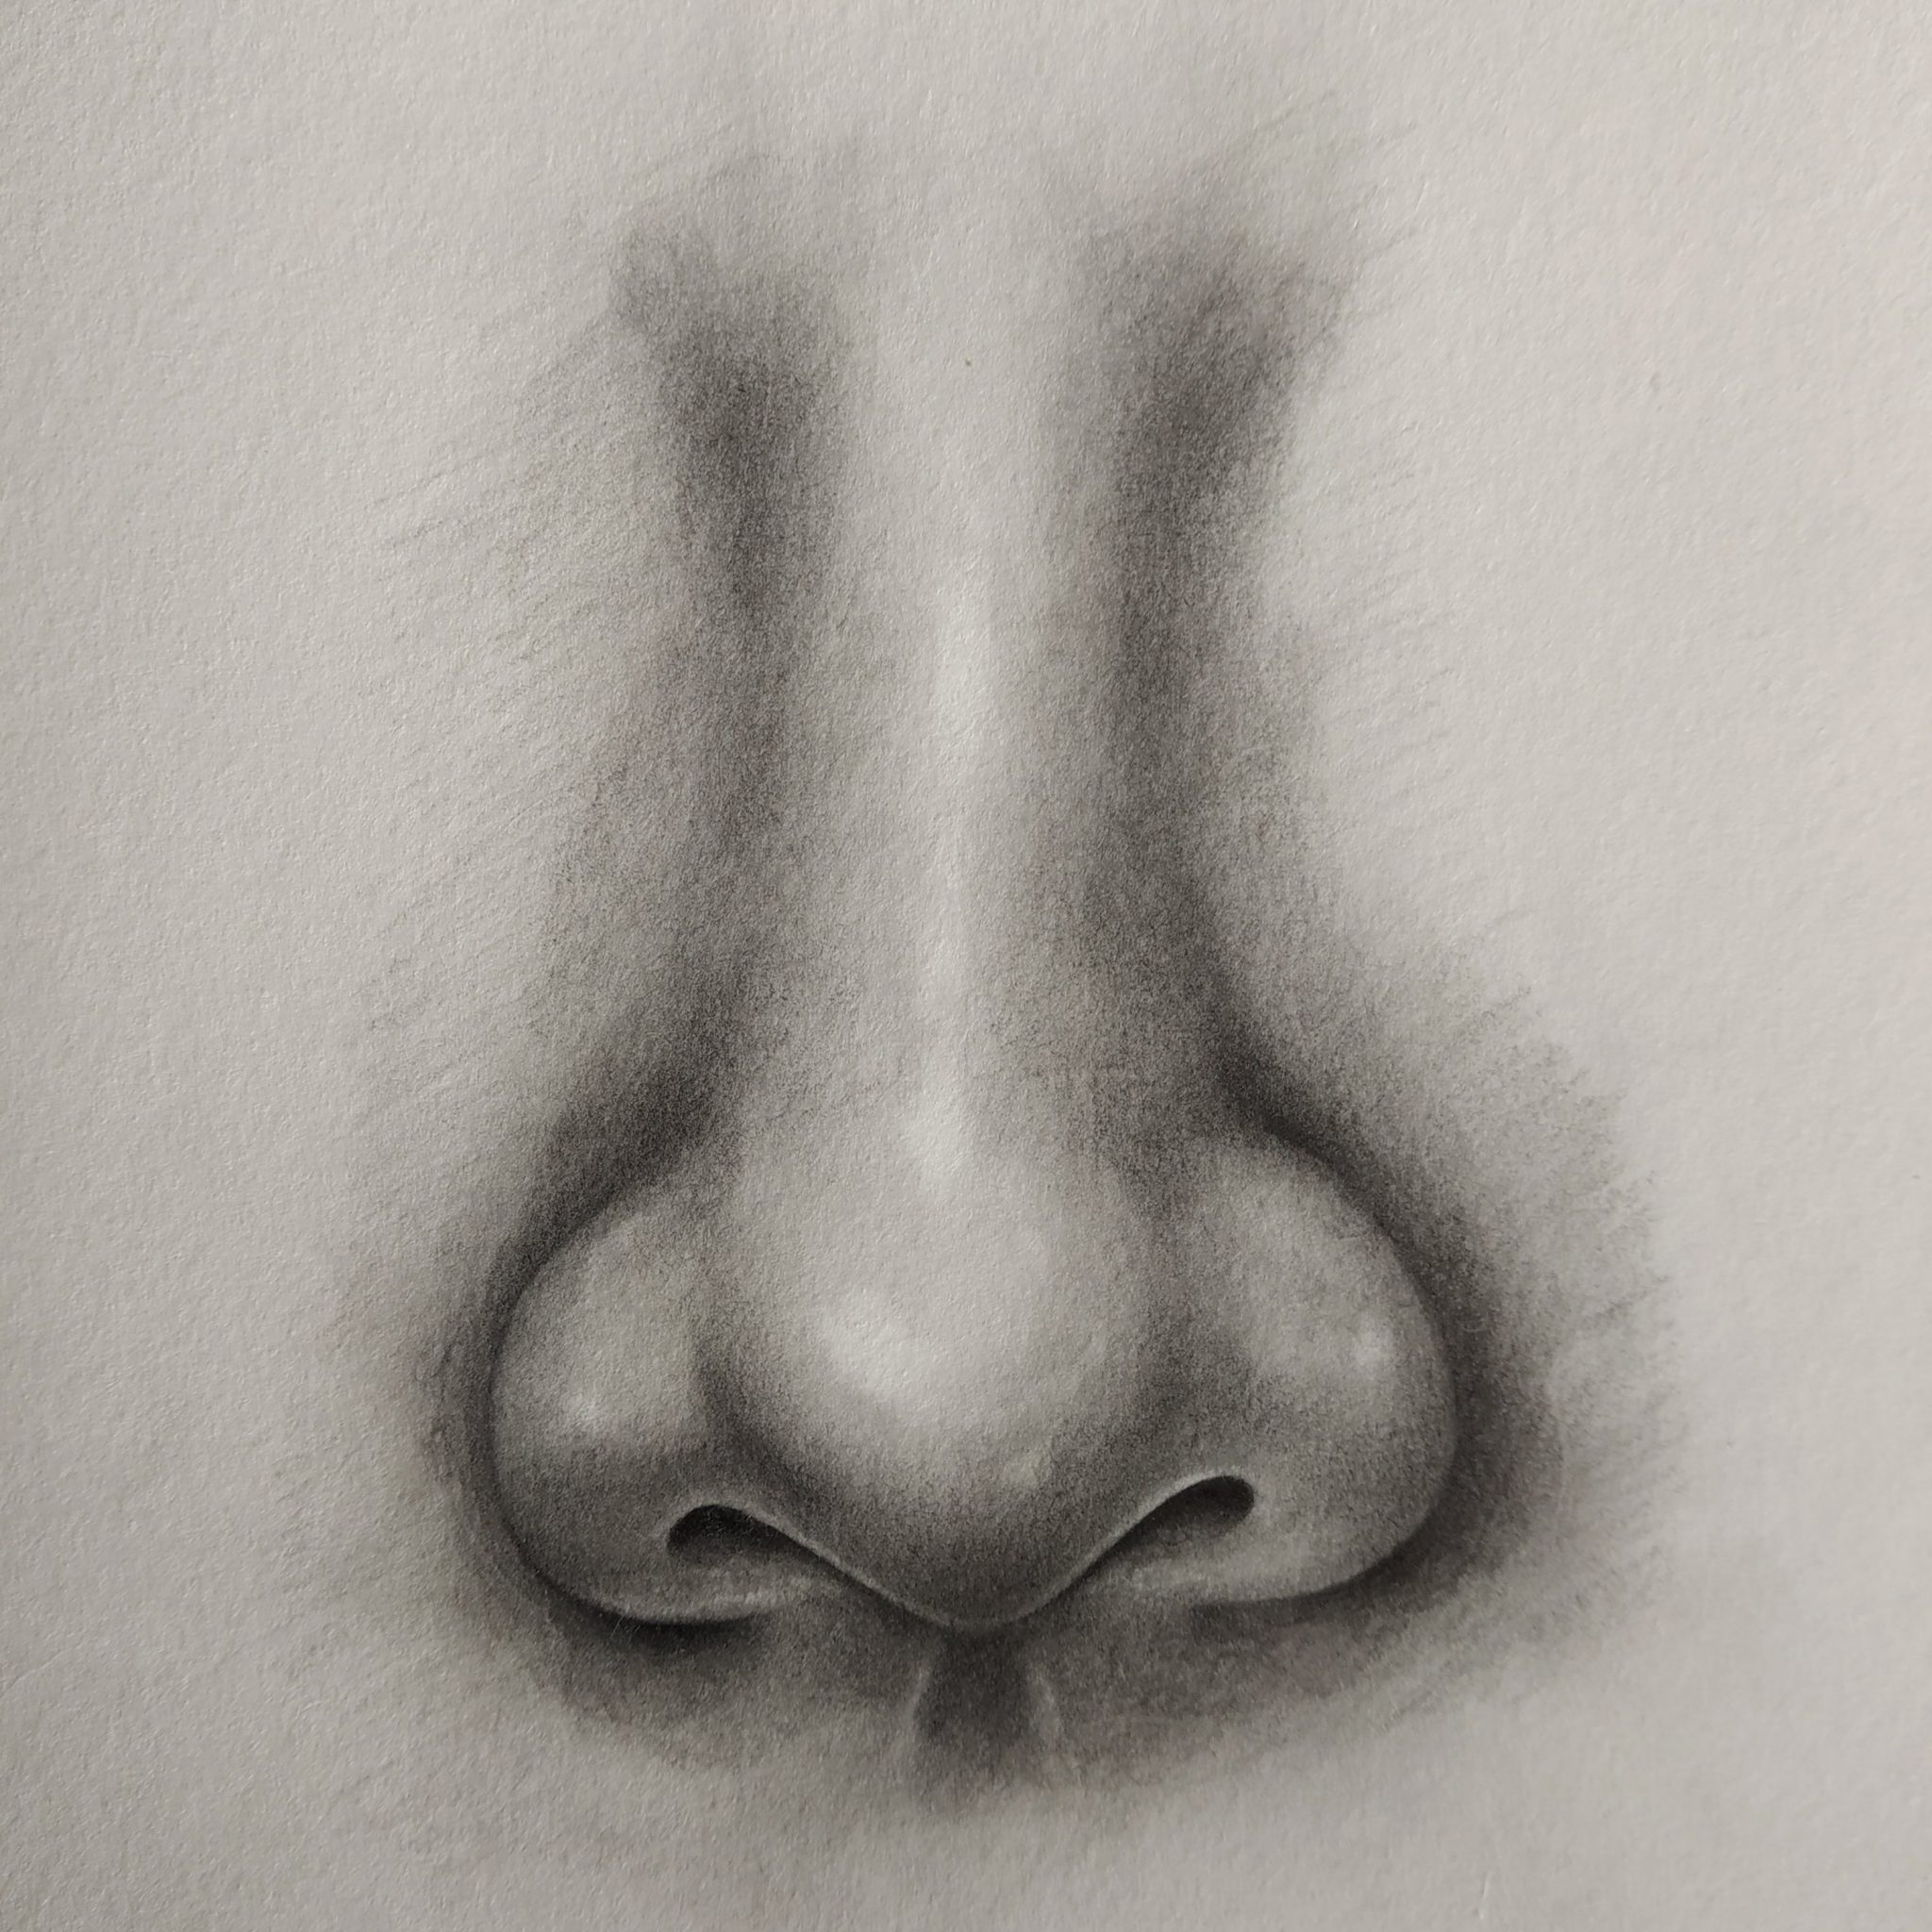
Nose Drawing- Seeing the Front View
When you are looking at a nose straight on, for a nose drawing, it might seem like the simplest view, but it can actually be a bit tricky, especially for someone just starting out. From the front, you see the bridge of the nose, the tip, and the nostrils, all more or less symmetrically. The challenge here is making sure that both sides look balanced and that the nose does not appear to lean one way or another. It is, basically, about getting those proportions right down the middle, which can sometimes be harder than it sounds. You know, like trying to draw a perfect circle freehand, it looks simple but needs a steady hand.
A good way to approach the front view is to start with a central line that runs down the middle of the face. This line can act as a guide to help you keep everything even. Then, you can use those simple shapes we discussed, perhaps a larger shape for the main part of the nose and two smaller shapes for the nostrils, making sure they are equally spaced from that central line. This helps you establish the overall width and placement before you add any more detail. It is, honestly, a very practical way to make sure your nose drawing stays centered and looks natural. This kind of careful setup really helps to avoid those slightly lopsided looks.
Once you have your basic shapes in place and feel good about their balance, you can then start to refine the lines, adding the subtle curves and dips that make a nose look real. Pay attention to how the light hits the bridge and the tip, and how shadows form around the nostrils. These little bits of light and dark are what give the front-view nose drawing its sense of depth and form. It is, in some respects, about seeing the subtle variations in the surface, and then trying to capture those with your pencil. You will find, too, that practice with this view makes it much easier to tackle others.
Nose Drawing- Capturing the Side View
Making a nose drawing from the side, also known as a profile view, presents a whole different set of things to think about. Here, you are not worried about symmetry across the face, but rather about the unique outline and projection of the nose from the side of the head. This view really highlights the nose’s overall shape, its bridge, and how it extends from the face. It is, like, a chance to really show off the character of a nose, whether it is long, short, straight, or has a particular curve. You know, it is where the personality of the nose really comes through.
When starting a side-view nose drawing, you might begin by establishing the line of the forehead and then how the nose extends from there. Think about the angle of the bridge, the curve of the tip, and how the nostril tucks underneath. Again, using simple shapes can be a big help. You might see the main part of the nose as a wedge or a triangle, with a smaller curve for the nostril. This helps you get the overall flow and angle right before you add the smaller details. It is, basically, about capturing that distinct silhouette that defines a nose from the side. This approach makes it a good deal easier to get the main shape down accurately.
The side view also gives you a great opportunity to show how the nose connects to the rest of the face, like the upper lip and the area between the eyes. Paying attention to these connections can make your nose drawing feel much more integrated with the whole face. And, of course, think about how light and shadow play across this profile, highlighting the curves and dips. The way light catches the bridge or the tip can really give it a sense of being real. It is, honestly, a very rewarding view to draw once you get a feel for it, allowing for a lot of expressive detail.
Nose Drawing- Thinking About Angles
Beyond the straight front and side views, there are all those in-between angles, which can feel a bit more complex for a nose drawing. These are the views where the nose is slightly turned, maybe a three-quarter view, or looking up or down a little. The trick here is to combine what you have learned from the front and side views, adapting it to the new perspective. It is, you know, about understanding how those basic shapes twist and turn in space. This kind of view really pushes you to think about the nose as a three-dimensional object rather than just a flat outline.
When tackling an angled nose drawing, it is super helpful to think about perspective. Parts of the nose that are closer to you will appear larger, and parts further away will seem smaller. Also, the lines that define the nose will appear to curve or shorten depending on the angle. For instance, if a nose is turned slightly, you might see more of one nostril than the other, and the bridge might appear to curve away from you. This is where those simple shapes really come in handy, as you can mentally rotate them and then sketch them as they would appear from that specific viewpoint. It is, basically, about translating what you see in three dimensions onto a two-dimensional surface, which can be a fun challenge.
Practice with these angled views is, frankly, what helps you get comfortable with them. Try sketching noses from different photographs or even from real life, observing how the light falls and how the shapes change as the head turns. It is all about training your eye to see the subtle shifts in form and proportion. This kind of observational work, you know, is really what helps you improve your nose drawing skills across the board, making your drawings feel much more dynamic and lifelike. You will find, too, that the more you practice, the more intuitive these angled views become, which is pretty satisfying.
Adding Depth- Light and Shadows in Nose Drawing
Once you have a good handle on the basic shapes and angles for your nose drawing, the next big step is to make it look like it is really sticking out from the face. This is where light and shadows come into play, and they are, honestly, incredibly important. Without them, a nose can look flat, almost like it is just painted onto the face rather than being a part of it. The way light hits the nose and creates shaded areas is what gives it that sense of volume and makes it feel real. It is, basically, how you make your drawing pop off the page, you know?
Think about where your light source is coming from. Is it from above, from the side, or perhaps from below? The direction of the light will completely change how the highlights and shadows fall on the nose. For instance, if the light is coming from above, the top of the bridge and the tip of the nose will likely be brighter, while the areas underneath, like the nostrils and the underside of the tip, will be in shadow. These bright spots and dark areas are not just random; they follow the form of the nose. It is almost like sculpting with light and dark, rather than with clay. This careful consideration of light is, frankly, what gives your nose drawing its true depth.
When you are adding shadows, do not just make them a flat, dark area. Shadows have different levels of darkness, and their edges can be soft or sharp. A soft shadow might indicate a gentle curve, while a sharp shadow could suggest a more defined edge. Also, think about reflected light, which is light that bounces off other parts of the face or surrounding objects and subtly illuminates the shaded areas of the nose. These little details, you know, can make a big difference in how convincing your nose drawing looks. It is about building up layers of tone, from the lightest highlights to the deepest shadows, which really brings the nose to life on your paper.
This article has walked you through some straightforward ideas for making a nose drawing, from understanding why it can seem tricky at first to breaking it down into simpler shapes. We looked at how to approach drawing noses from the front, side, and various angles, and how important light and shadows are for giving your drawings a sense of depth. The key takeaway is that with a little bit of practice and by focusing on these basic principles, anyone can get better at drawing this unique facial feature.